 |
|
|
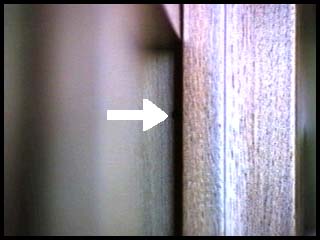
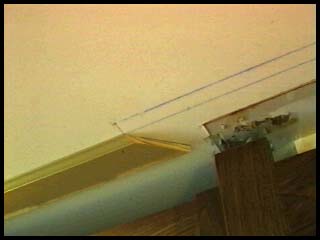
I have to apologize for not getting the final two installments finished in due time. There was another job which needed finishing before Xmas and the holiday hubbub got the better of my energy quotient. That said, I returned to Mr. D.'s on Monday to continue installation. With the main pieces just sitting in place, the first task was to get them fastened together and anchored to the wall. The two upper cabinets were plumbed and screwed to the base cabinets through the base cabinet stretchers. Then the fireplace surround was screwed to the upper cabinets using trim-head screws. These screws are square-drive and have smaller heads. And you can hide them out of sight pretty easily by tucking them in dirextly behind the faceframe, (photo right). |
 |
|
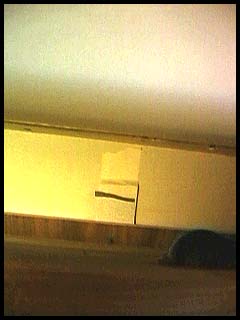
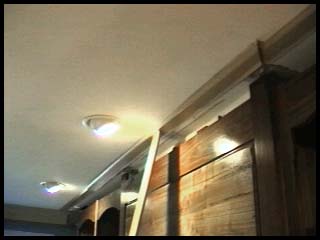
Fastening the upper cabinets to the wall was also pretty easy. If you remember, the 3/4" upper cabinet backs were run about an inch taller than they needed to be so there would be a screwing flange above the unit. Before sliding the upper cabinets in place, the wall studs were located and marked - this would have been hard to do afterwards in the narrow space above the unit. The photo at right is of the narrow space above the upper cabinet. The proper thickness of shims, in this case: two pieces of 1/4" ply and one piece of laminate, are taped together and dangled off the wall behind the cabinet back. Then one screw is driven through the back into the stud. I was fortunate in that the wall leaned slightly away from the cabinets. Had it leaned forward, there might not be space for shimming or worse, the upper cabinets would be forced out of plumb. This is one of the things which needs addressing during the installation of the lower cabinets and a good example of what's needed during any project such as this - planning, planning, planning! |
 |
|
Once everything is fastened down tightly, it's time to cover the gap at the cabinet tops with new crown molding. Because the house is relatively young, I was able to find stock moldings of almost the exact same profile as existing moldings. The crown assembly in this room consisted of three pieces: two backer strips with a simple ogee edge and a 5 1/2" wide crown. At right is the upper backer strip with one end coped to meet with the existing molding. I back-cut the molding prior to coping so I wouldn't have so much wood to shape. the back-cut notch will be hidden behind the new crown. |
 |
|
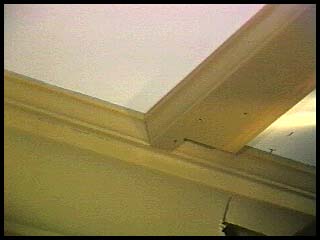
Here's the corner after the top backer strip is nailed in place. It's not a perfect fit but paint-grade installations don't need perfection. Caulk hides a multitude of mistakes. Also, there is no ceiling joist along the line of this particular molding. To anchor it securely to the ceiling, the back of the molding is buttered with construction adhesive and pneumatic nails are shot into the drywall at opposing angles to hold the molding up until the adhesive sets. BTW, Mr. D. prepainted the new moldings - what a guy! |
 |
|
Here's the other end of the same board and the layout lines I've snapped onto the ceiling. Until I work to the other end of the unit, all the cuts in the backer strips are simple miters. The two parallel chaulk lines represent the amount of protrusion the fireplace surround has in relation to the two flanking upper cabinets. I nail the pieces in place to just cover the chaulk line. I wish I could get into installing crown molding with more detail since it's definitely an area of much confusion. Because I hardly ever do it, I'm continually re-learning the process with the start of every new job. I'm not an expert! |
 |
|
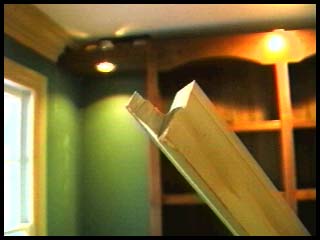
With my able assistant, Mr. D. spending the day at work, I have to finish up alone. Crown molding is difficult enough by yourself but fortunately there are work-arounds. To get the top backer fitted and nailed into place, a jam-stick is used to hold it on the ceiling while I take this picture. Where there is a will, there is a way...;) Notice the blocking peeking up from behind the top of the fireplace surround. This was much easier to install than the shims behind the upper cabs. |
 |
| Running the lower backer strip is much easier since I have the cabinet faceframe to nail to. Now we're ready to cut some crown. | 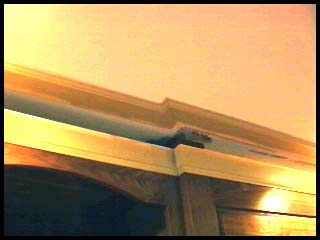 |
|
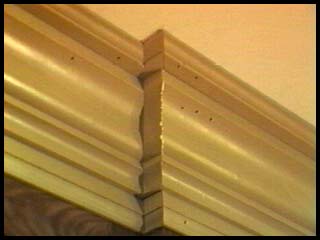
Cutting the crown turns out to be pretty straightforward. We have standard molding with the 38/52 angles to the corner, so I can cut the miters using the installed detents on my DeWalt miter saw while the molding is laying down flat on the saw table. Otherwise, I use the upsidedown and backwards method so I can skip all the tricky calculations. In the picture, the two short returns are too small to nail so I just glue them in place. The back miter is held together using masking tape hidden behind the molding. I also cut the returns so they are off-cuts to a larger piece - too small to hold at the saw otherwise. |
 |
|
Here's a shot of the tools I dug out this day. The jig saw was used to waste the molding ends in preparation for final coping. In use, I hold the saw upsidedown with my thumb on the trigger. It can be pointed away from me or towards me depending on the cut. I hold the workpiece in my other hand. With the majority of the cut removed, the final fiting is done with an assortment of files and rasps, a sharp chisel or a razor knife. Flat areas are smoothed with a sandpaper-wrapped block of wood (lower left). Missing in the photo is a half-round rasp I really found handy with the long s-curve of the crown's ogee. I couldn't find it anywhere and I suspect I left it on top of the cabinet right before nailing in the last piece of crown. This isn't the first time I've buried a tool behind an installation and it won't be the last...:( |
 |
| Here's the shot of of the jobsite at the end of the day. In the foreground are my mitersaw and finish nailer - a Stanley/Bostich 15 gauge gun I really like for it's rubber foot (no denting) and angled design. Out of the photo is a small "hot dog" compressor which is ideal for on-site nailing. | 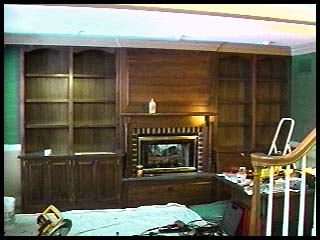 |
|
If you have any questions or comments about Mr. D's Walnut Wall Unit, please post them at the Info Exchange. Jim Mattson |
|
| Onward to the Next Installment | |